Video Splicer For Mac Laptop Compilation Videos
Apple is famous for their easy to use consumer software such as Garage Band and iMovie. However, I've found their apps a little hard to use. Why? Because their suite of software, mainly the consumer apps I've mentioned, errs on the side of ease of use.
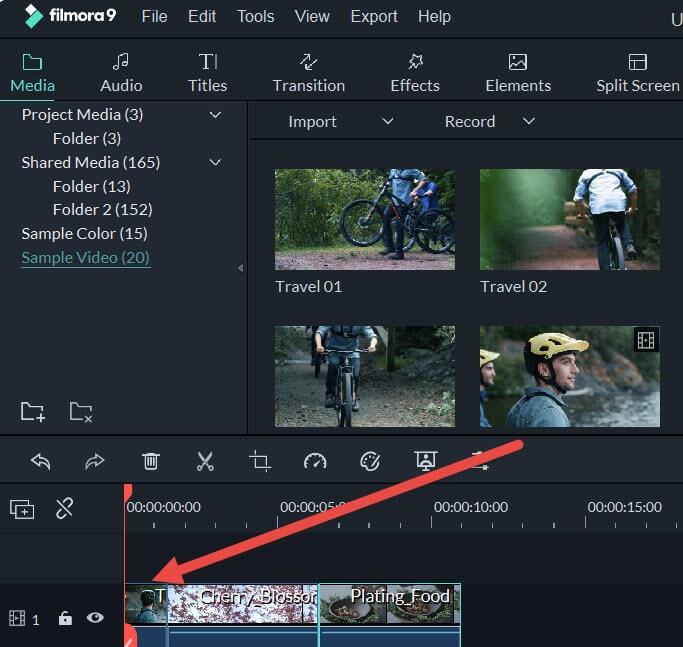
Download and install this video splicing software on your computer. The below guide is based on Windows, but the Mac version works almost the same. 1 Import your videos Get started to splice your movies together by clicking 'Import' to load your source files to this program. Since it supports almost all popular formats out there, you won't. If your video clips are on a video camera, you'll either need to connect the video camera to your computer via a USB cable or plug the camera's SD card into your computer. After that, you can select the camera in File Explorer (Windows) or Finder (Mac), open the DCIM folder, and move the files onto your computer.
• Click the Download Google Drive for your Mac button. • Open Google Drive from your Applications folder. • Open installgoogledrive.dmg. • Open the installation file and drag the Google Drive icon to your Applications folder.  (You may receive a warning that Google Drive is an application downloaded from the Internet.
Isn't that a contradiction? Not really, because the problem here is that Apple tries hard to make something simple by hiding complexity.
The end result are apps like iMovie for the iPhone, which are justly praised for bringing editing to a mobile device, but whose operations and functionality can be limited and opaque. Take a look at the screenshots of Apple's iMovie and competitor Splice below. Looking at those two screenshots, which application looks like it means business? This is not to denigrate Apple's U.I. Design, which is often superb, but notice how much space the non-functional iMovie label takes up in the first image. We're already using iMovie, so why do we have to be reminded that we're there? For the same reason that the 'neon' flickers on when you launch the app: iMovie is intended as a demonstration of what the iPhone can do in terms of image and audio processing rather than as simply a super useful tool.
Configure mac for gmail. Google’s Gmail is a popular email service, both for personal and business use, and there are a number of options for using it on your Mac. Select Mail > Preferences. From the menu in Mail. Go to the Accounts tab. Click + (plus sign) under the accounts list. Make sure Google is selected under Choose a mail account to add. Click Continue. Type your full name under Name:, and your Gmail address under Email Address.
It's an advertisement for itself. Which is not the case with Splice.
With Splice, you get a no-nonsense editor with more functionality than iMovie and a price—free—that's better, too. Let's look at how it works. After creating a new project and naming it in the opening screen, you select your video and audio clips. Notice in the frame-grab above that you select multiple clips at one go, and that it works with the albums you have on your phone. The second photo in the gallery is from iMovie, in which you can only select one clip at a time. It doesn't seem to know that albums exist—all video is grouped by the day it was shot.
Once you've selected your clips, Splice automatically puts them on a timeline for you, with transitions of your choice. Speaking of transitions, take a look at the options the app gives you. Yes, that's right. It actually seems to be a real video editor! Compare that to iMovie's options in the second screen-grab. In the Splice timeline, your clips can be re-positioned at will and each clip is labeled with a variety of options: edit, change speed, crop, duplicate or delete. It's all extremely simple and clearly laid out.
Even the novice should be able to pick up the user interface dynamic quickly. You'll notice in the shot above that there's an audio button in addition to video. Unlike iMovie, which only allows you to have one audio track in addition to a live mic track, Splice gives you a bit more functionality.
You can see an example of this in the images below, with the Splice audio interface first, followed by iMovie. Once you're finished editing and you've previewed your project as much as you need, you export the finished movie in either 960x540p resolution or 1280x720. In this regard, Splice doesn't offer as much functionality as iTunes, which allows you to save in 360, 540 or 720p, and allows one-touch uploading to YouTube, Facebook, Vimeo and CNN iReport. Pros • Simple, yet powerful interface.